Configuring Microsoft 365 with Sorb SCES by M365 Connector
Reroute Microsoft Office 365 Email Using Connectors
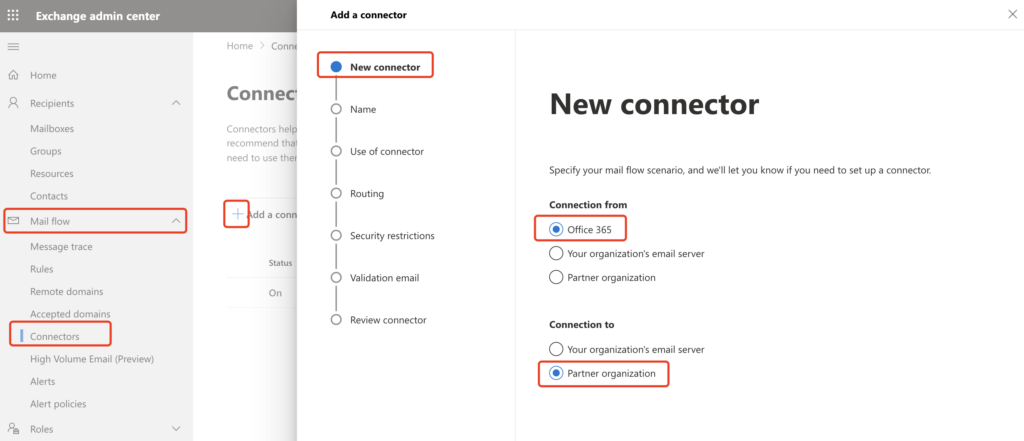
1. Log into the Office 365 Admin Center(https://admin.microsoft.com) and open the Mail Flow pane. Then navigate to Connectors(https://admin.exchange.microsoft.com/#/connectors)
2. To create new connectors, select connectors and add a new connector.
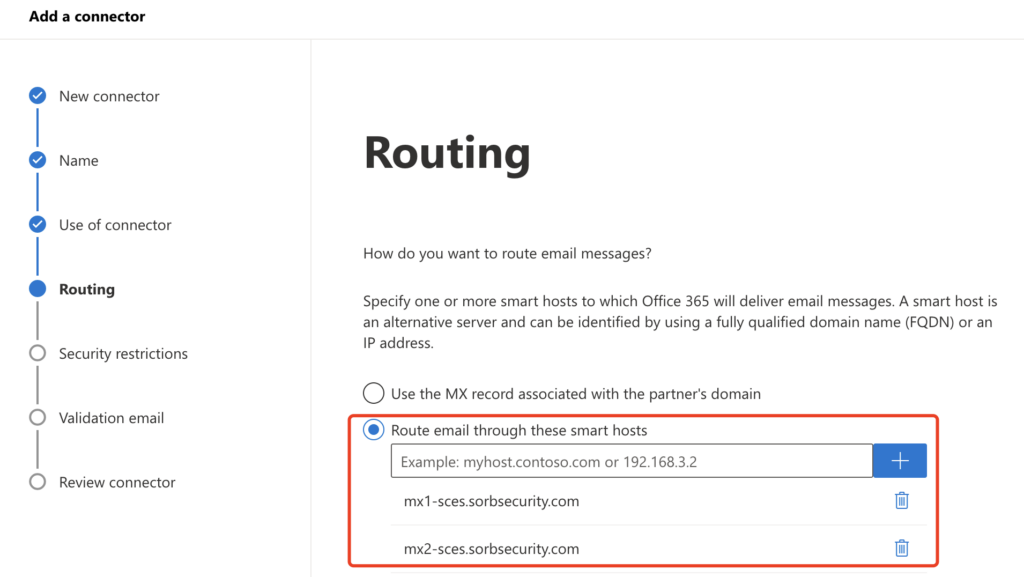
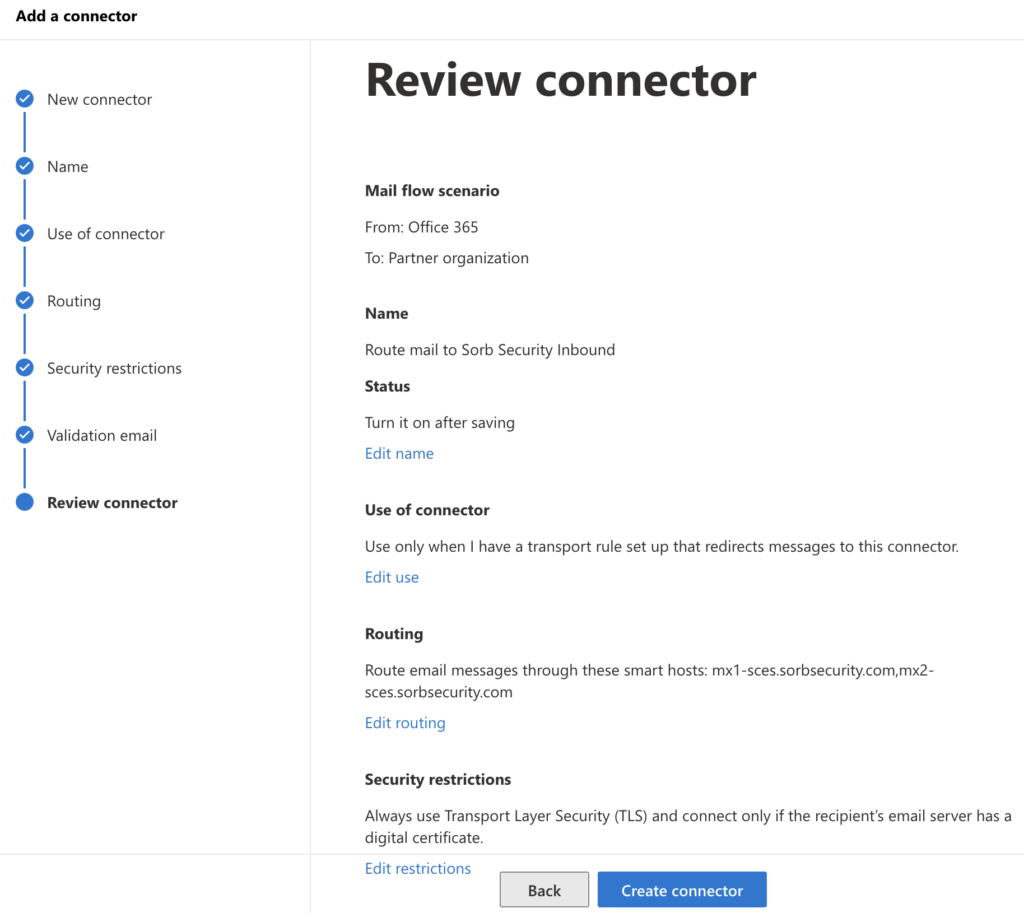
3. Create Connector with name: Route mail to Sorb Security Inbound
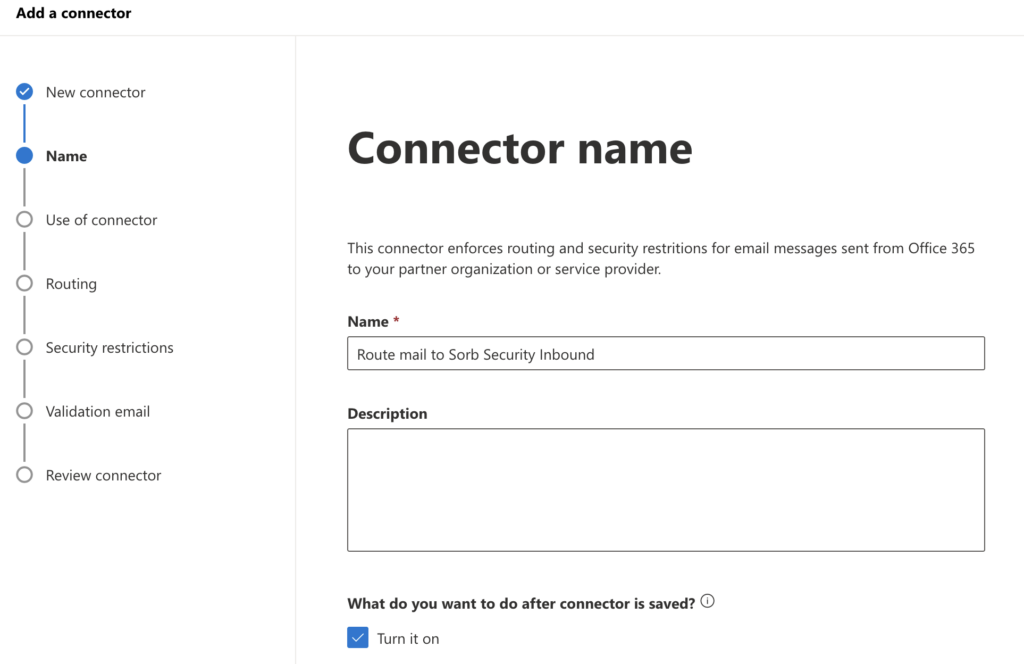
Specify the next hops to mx1-sces.sorbsecurity.com and mx2-sces.sorbsecurity.com which comes from Sorb Cloud Connection Details.
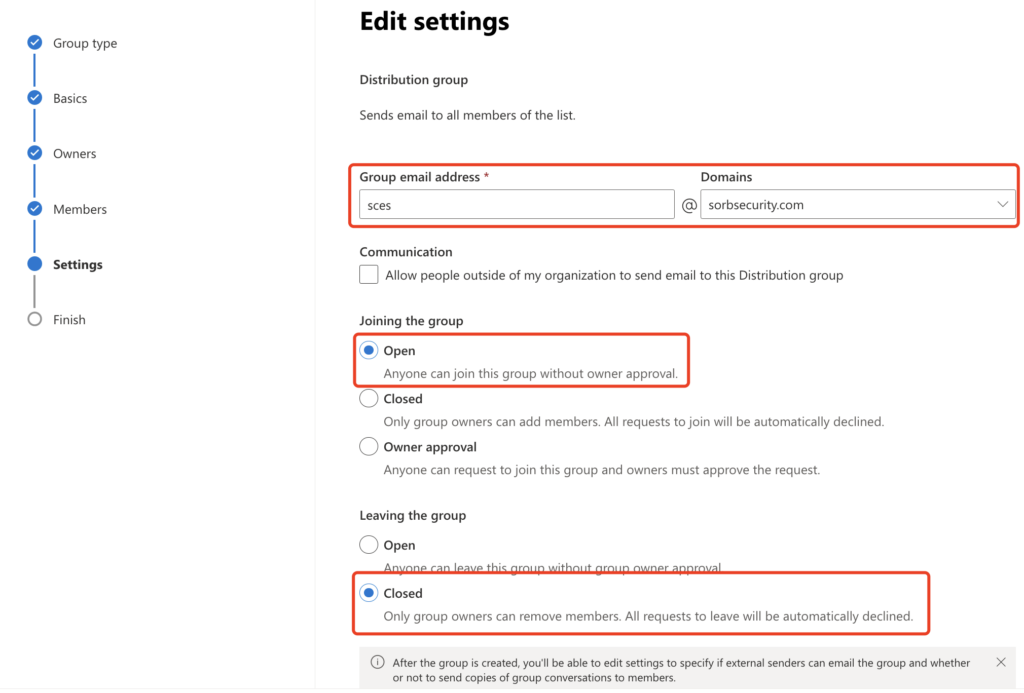
4. Create a new Distribution Group named, “SorbSecurity”
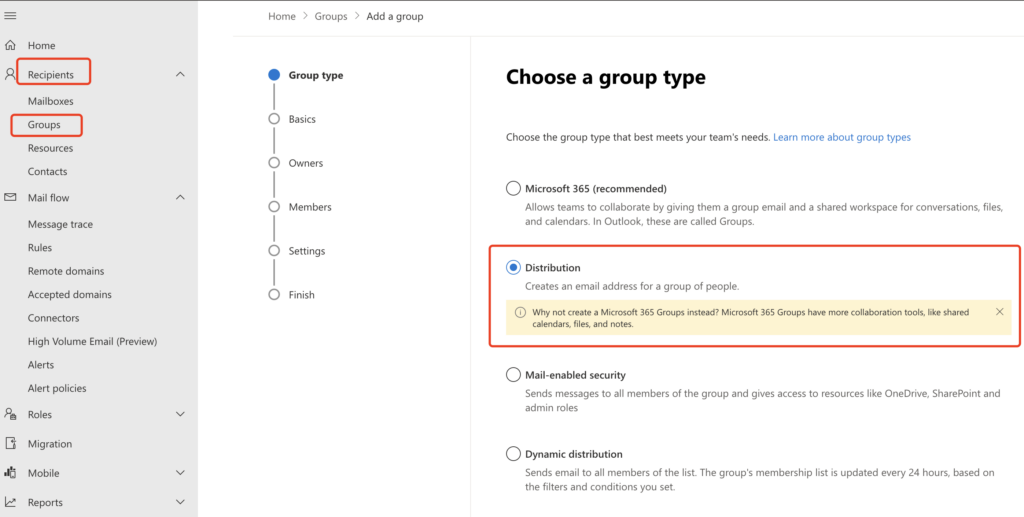
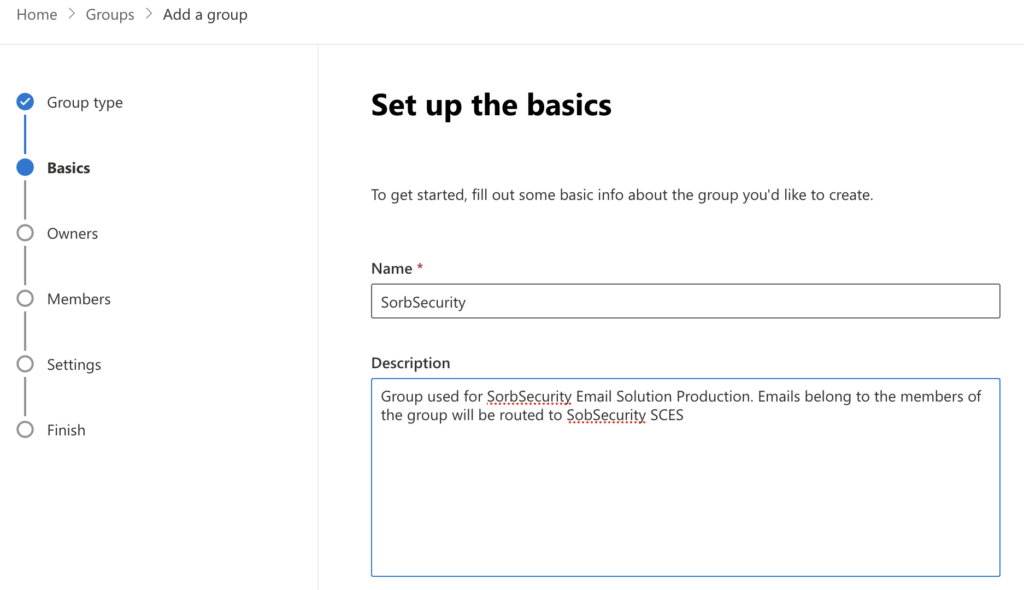
Then, select the owner and members. Finalize with the settings below.
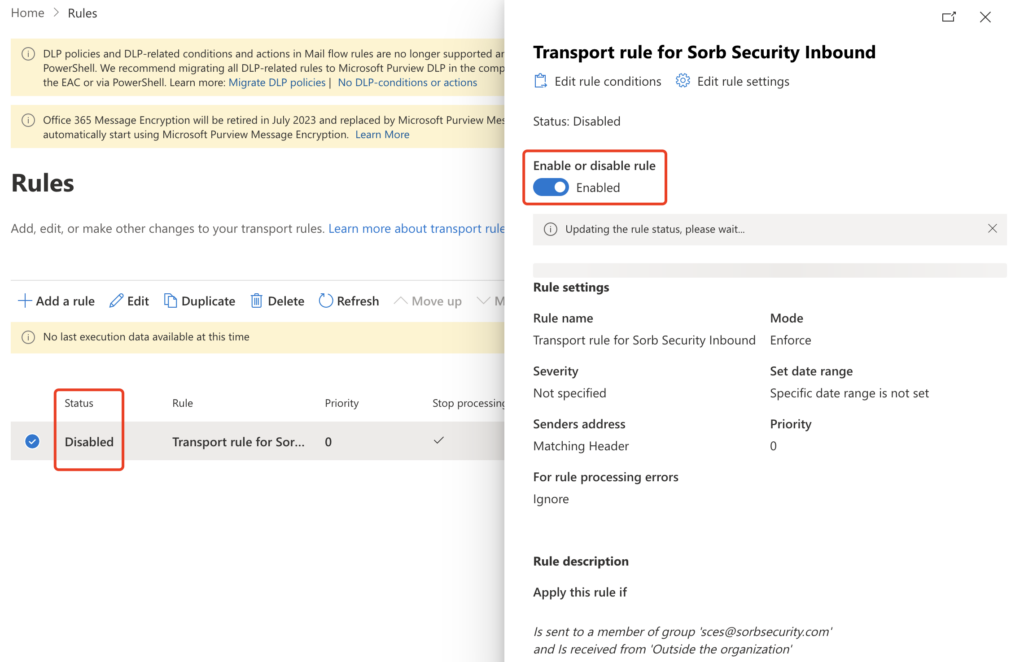
5. Create Microsoft Office 365 Inbound Transport Rule named, “Transport rule for Sorb Security Inbound”, with the following settings.
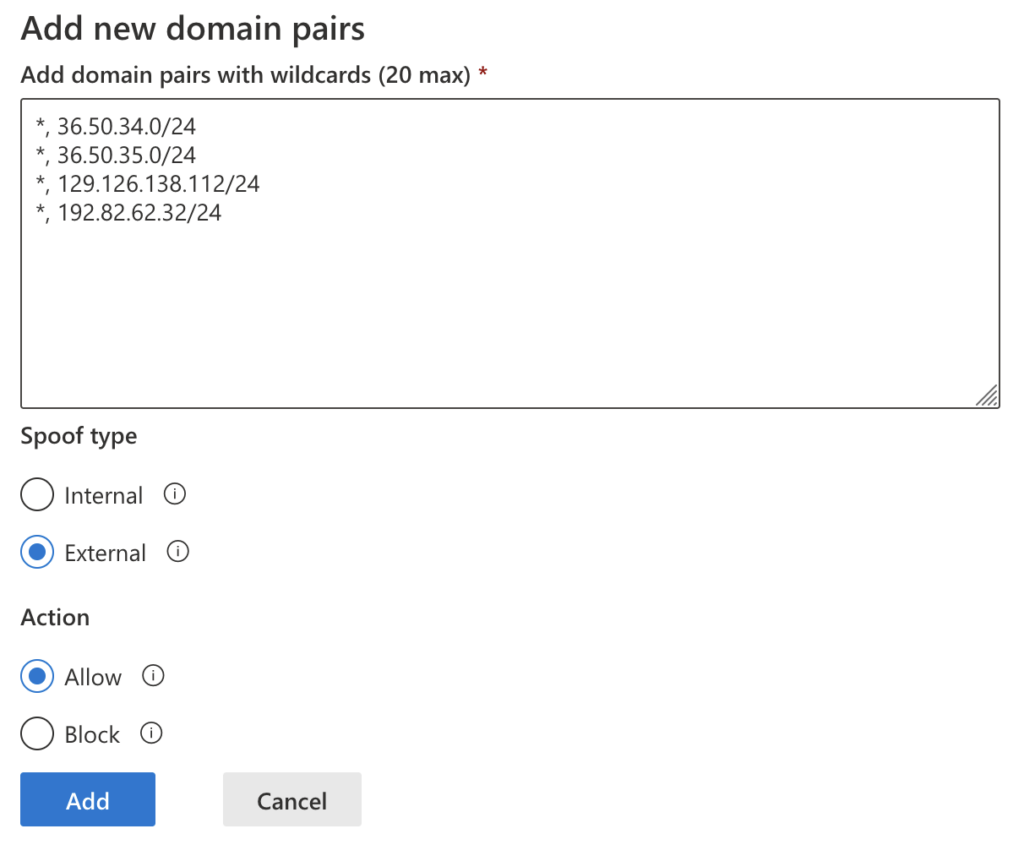
5.1 Sender is Not in Organization and recipient is from the SorbSecurity Group just created. Except the sender is from Sorb SCES, 129.126.138.112/28, 36.50.34.0/24, 36.50.35.0/24, 192.82.62.0/24 from Sorb Cloud Connection Details. This is to avoid Email loop.
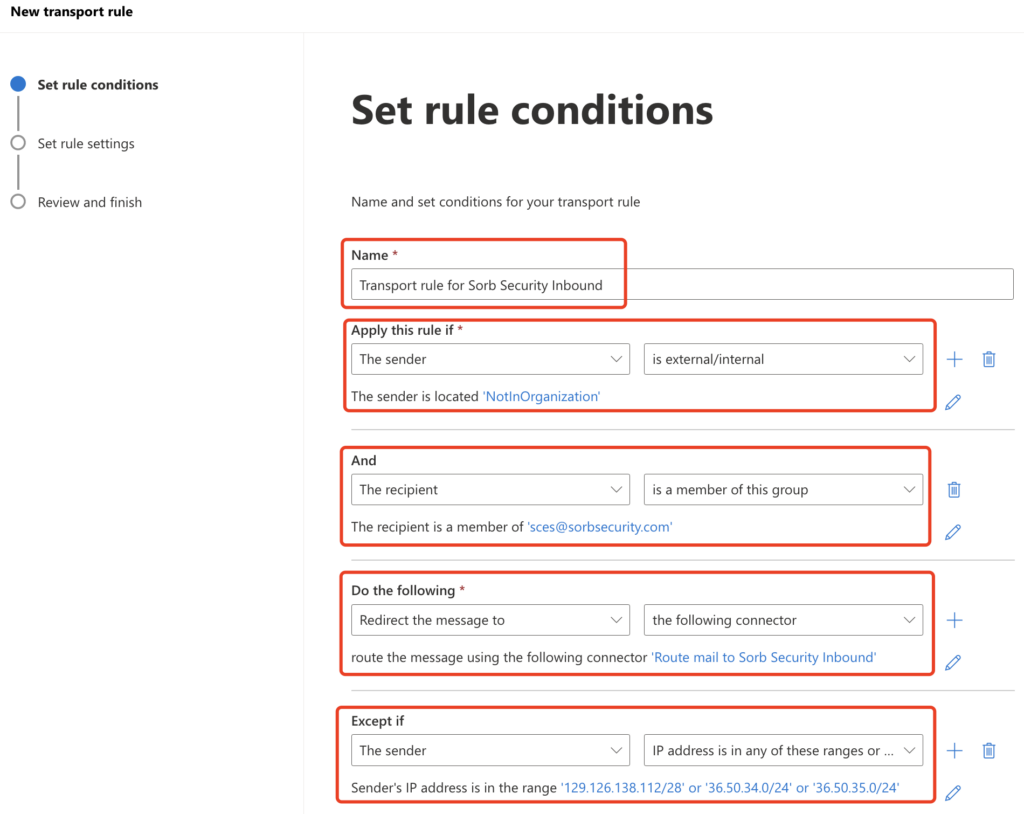
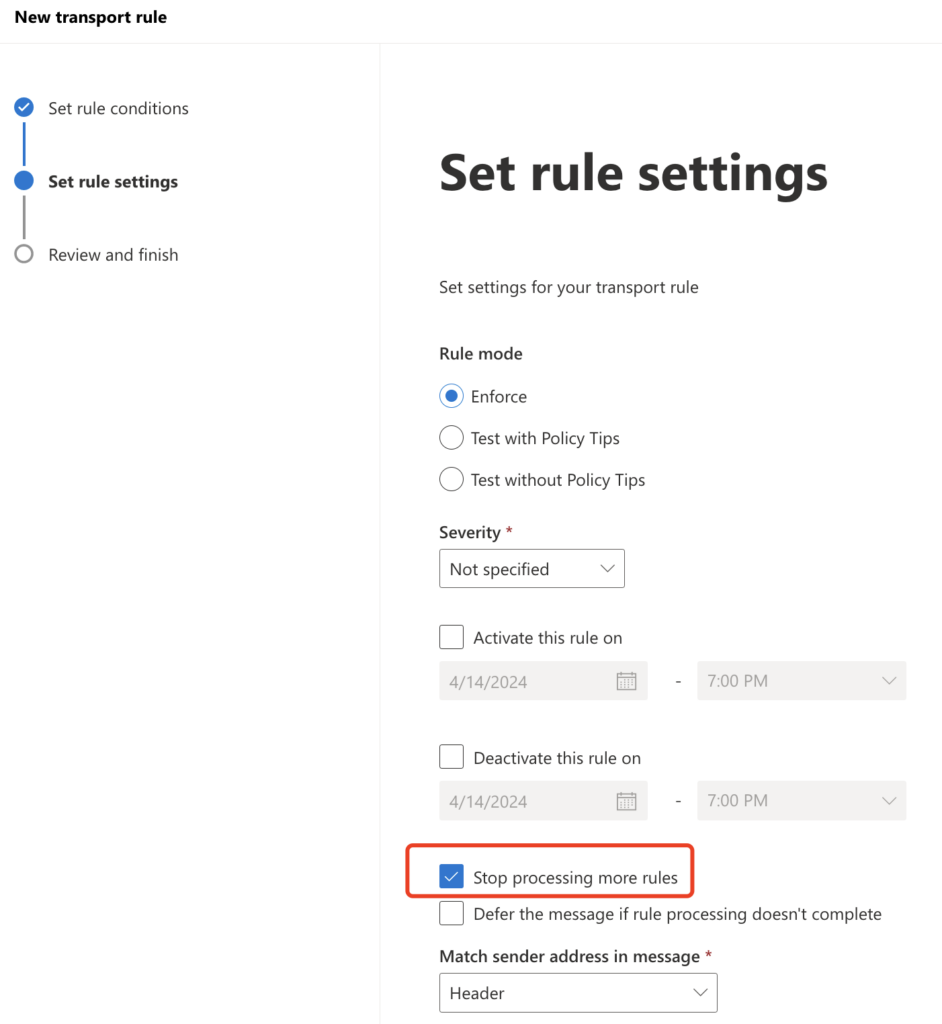
Enable the new Rule
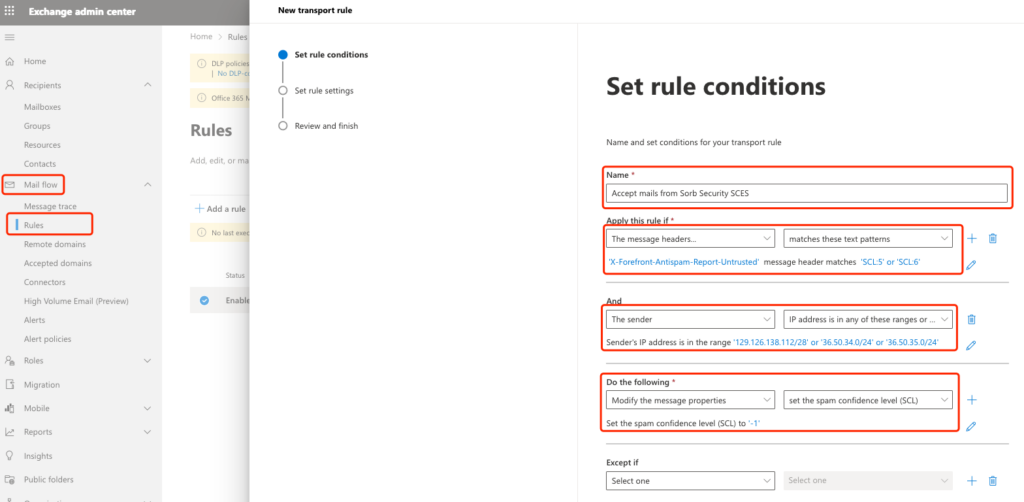
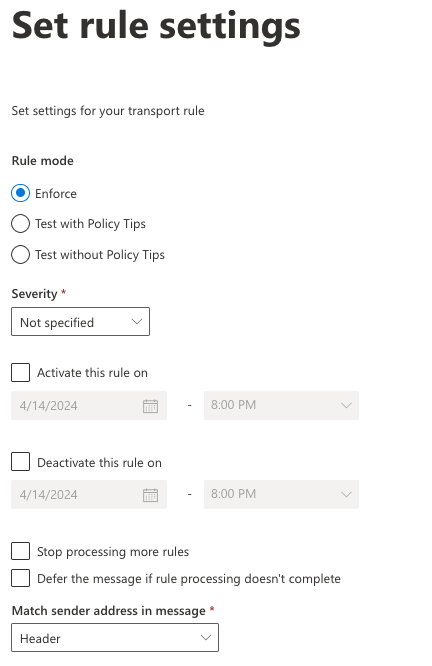
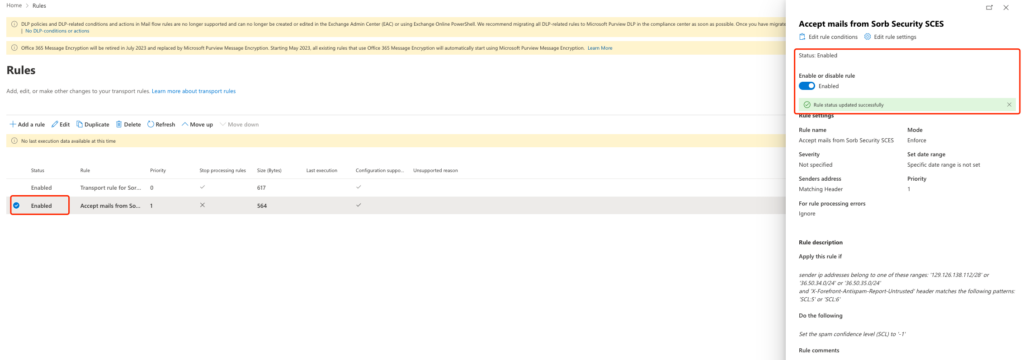
6. Create the Accept mails from Sorb Security Cloud rule named, “Accept mails from Sorb Security SCES”, with the following settings
6.1 The message headers matches “X-Forefront-Antispam-Report-Untrusted”, value “SCL:1”, “SCL:2”, “SCL:3”, “SCL:4”, “SCL:5”, “SCL:6”. And, the sender is from Sorb SCES, 129.126.138.112/28, 36.50.34.0/24, 36.50.35.0/24, 192.82.62.0/24 from Sorb Cloud Connection Details. Set the action to Modify the message properties to set the SCL to -1.
Enable the new Rule
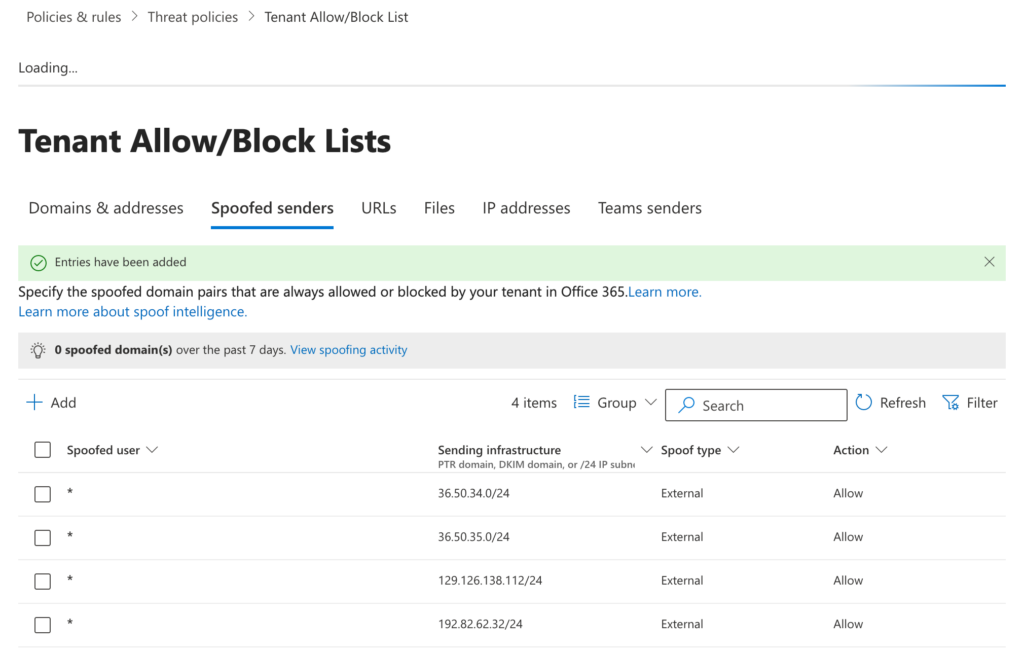
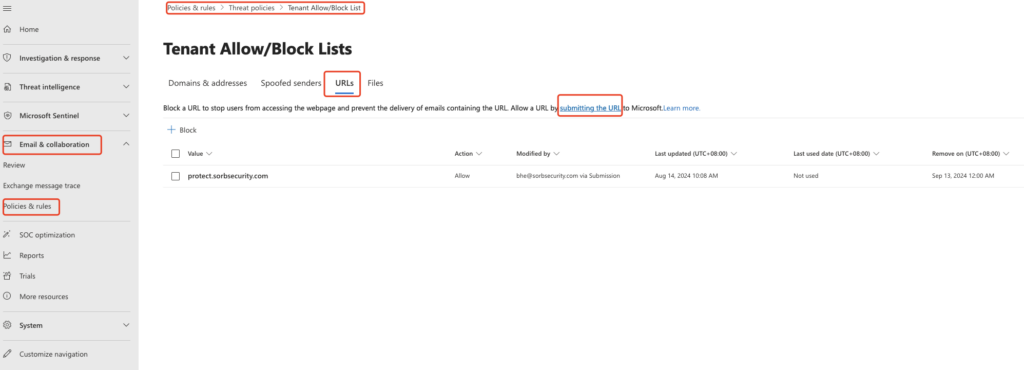
7. Trust Sorb to avoid “Unverified” banner at Policies & rules – Threat policies – Tenant Allow/Block List.
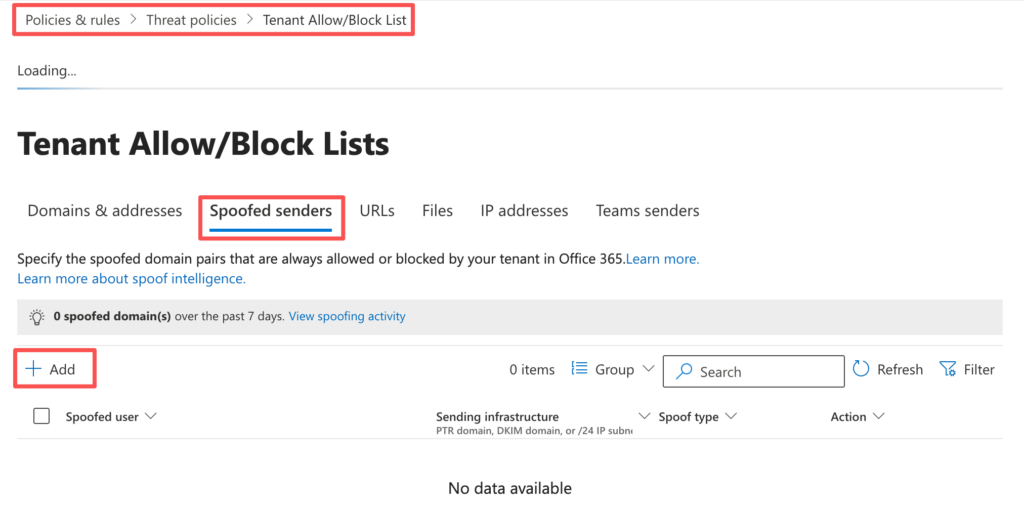
The configuration shall look like this,
8. Configure Outbound Routing
8.1. Log into the DNS Admin Console to update SPF record from here
v=spf1 include:spf.sorbsecurity.com include:spf.protection.outlook.com ~all8.2. Log in to the Sorb Admin Console, https://admin.sorbsecurity.com
8.3. Navigate to Mail Routing | Outbound. Follow the SPF record “spf.protection.outlook.com” to add the ip4 subnets to Outbound Mail Source
40.92.0.0/15
40.95.0.0/16
40.107.0.0/16
52.100.0.0/14
104.47.0.0/17
8.4. Log in to the Microsoft 365 Exchange Console, https://admin.exchange.microsoft.com
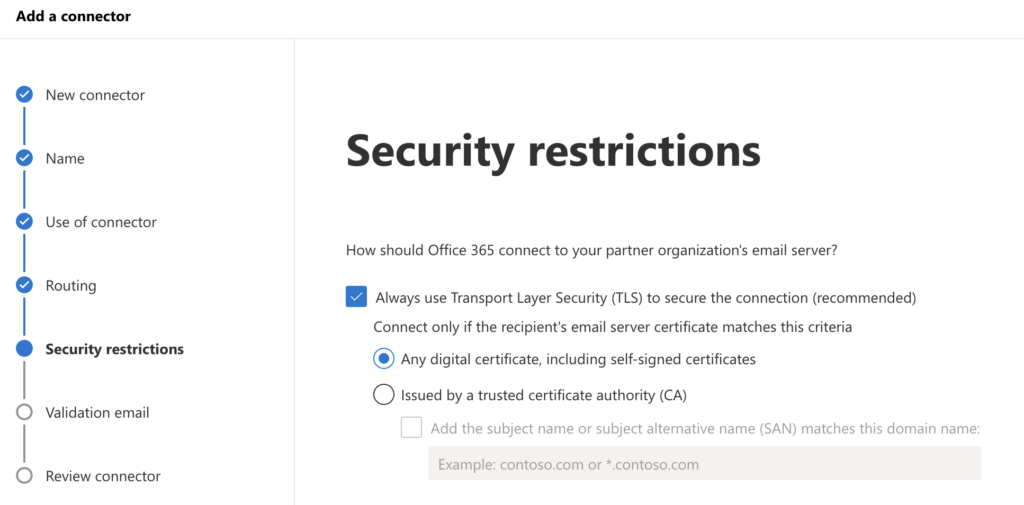
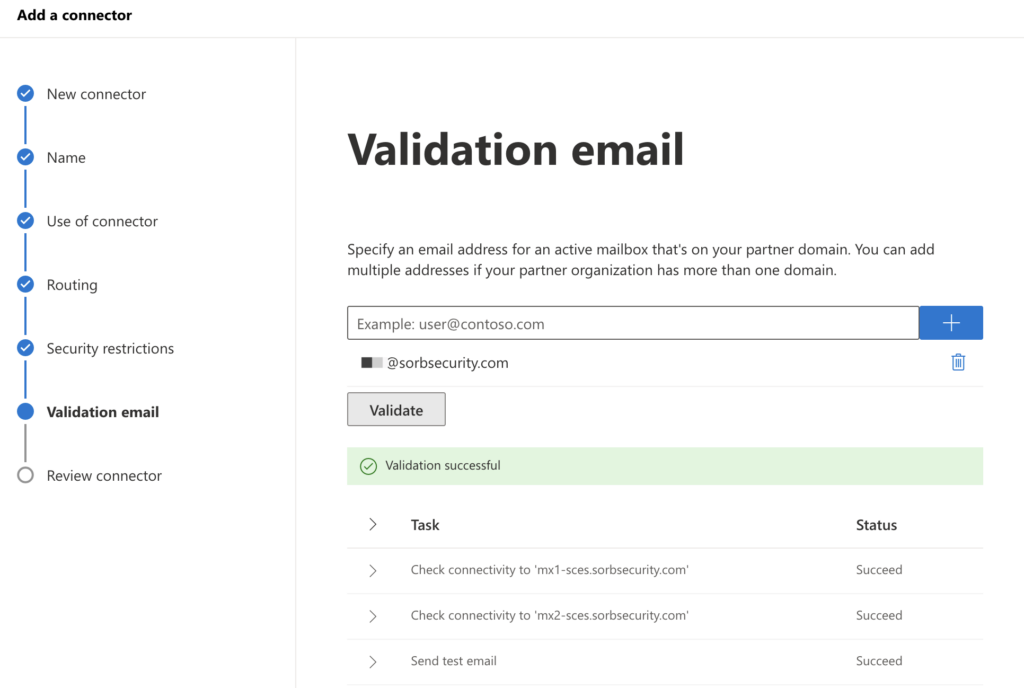
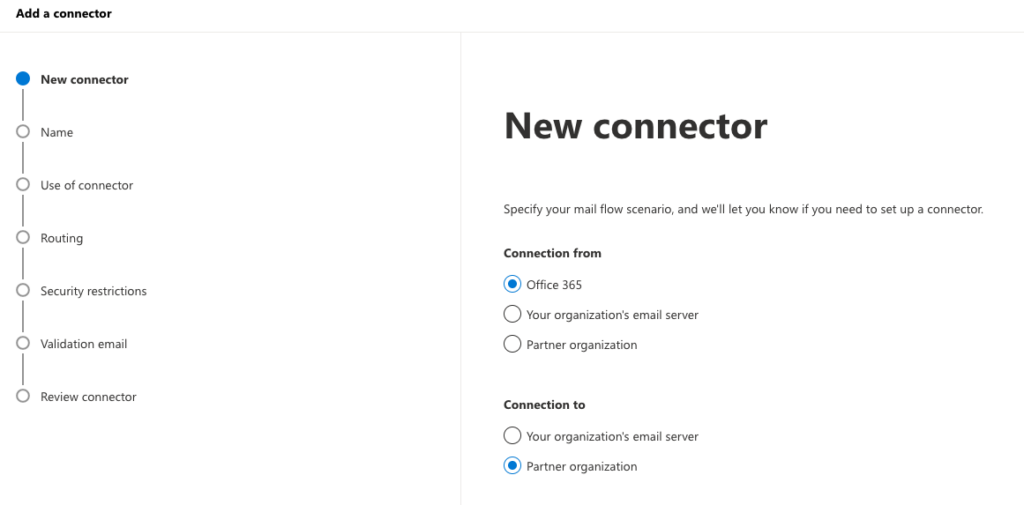
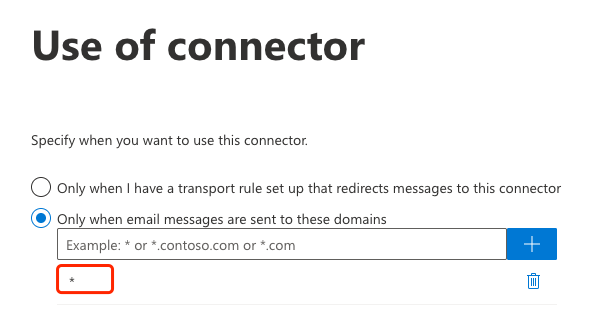
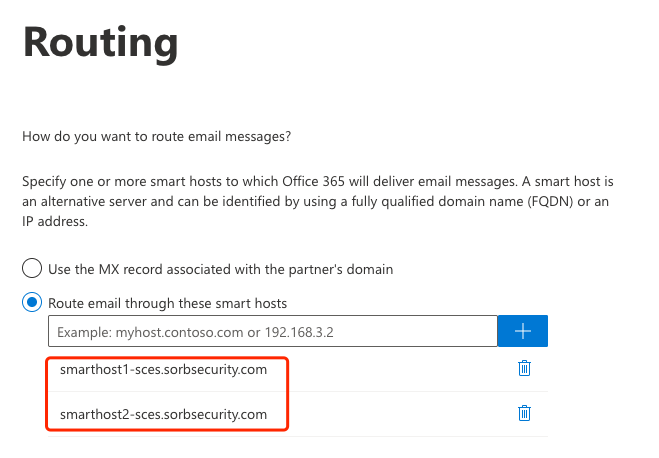
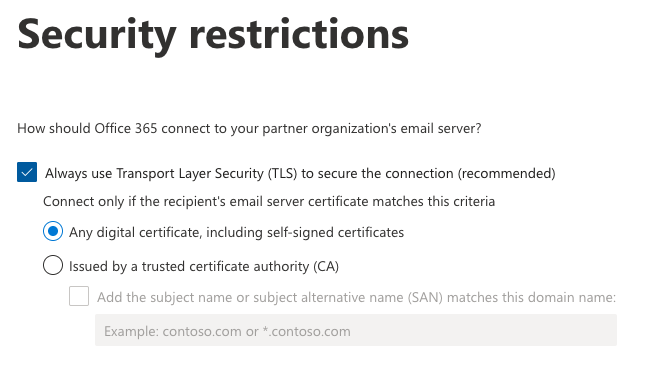
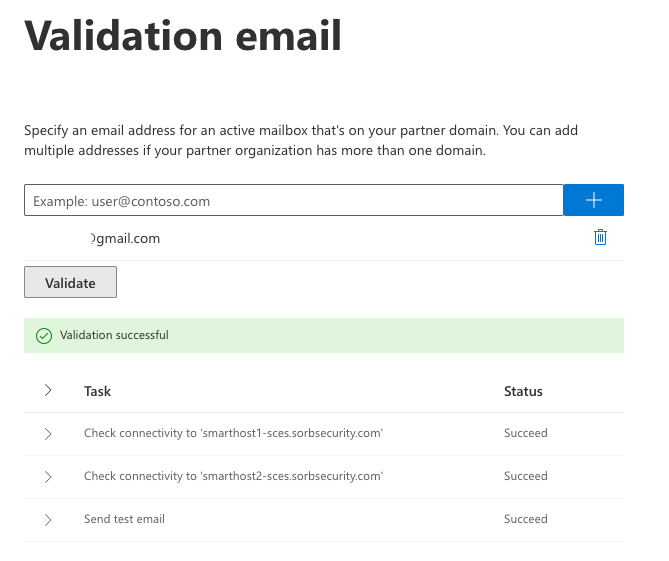
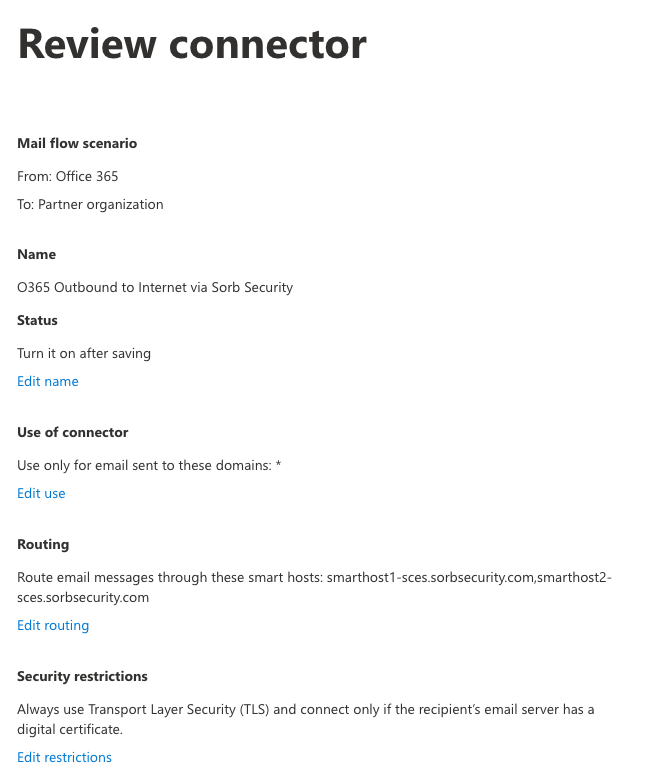
8.5. Navigate to Mail Flow | Connectors, Click “Add a Connector”. Configure the new connector as the figures

9. Bypass Anti-Phishing Feature on M365(Optional & Suggested)
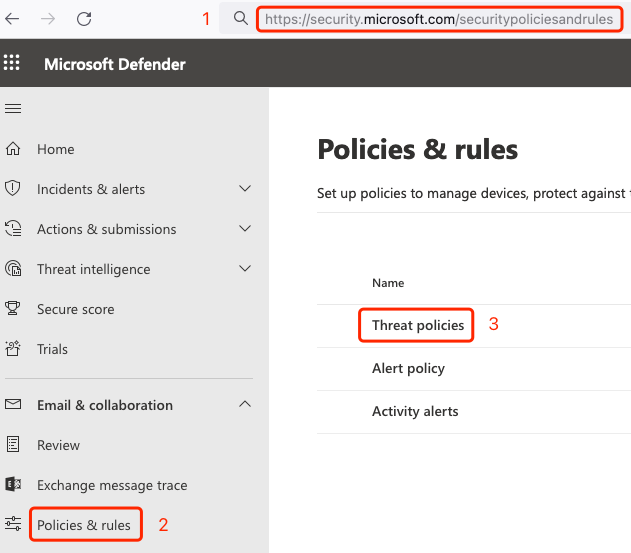
9.1. Go to Security on M365, then choose Policies & Rules -> Threat Policies.
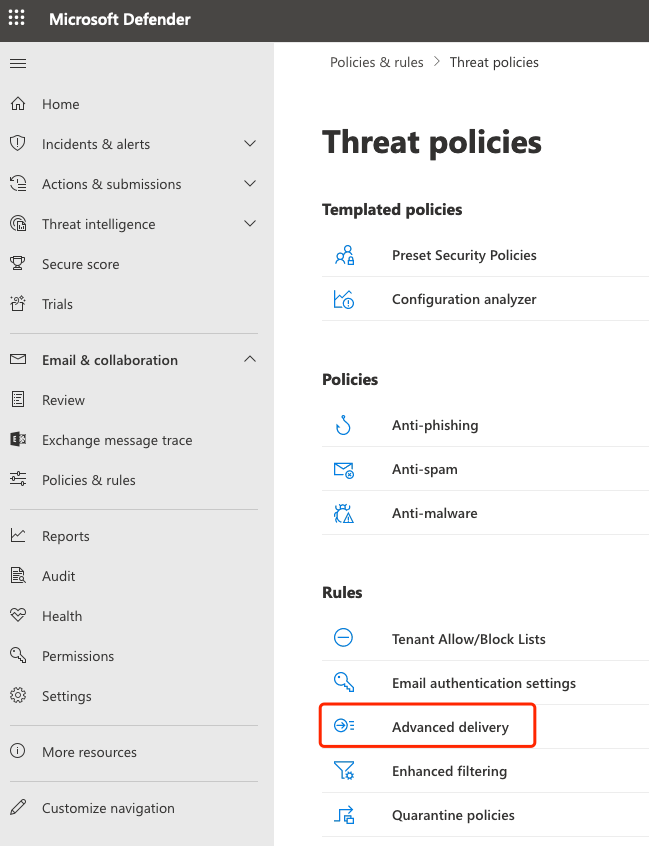
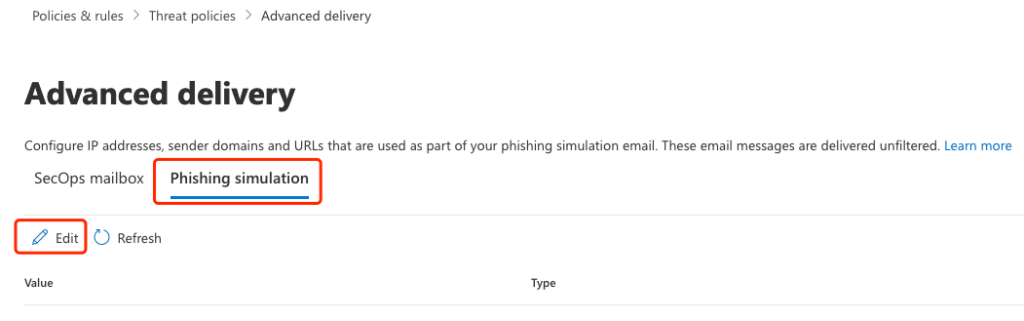
9.2. Navigate to Advanced devliery, then choose Phishing Simulation tab, click Edit
9.3. Find Sending IP and click the arrow to expand the input form. Then fill up the IP and save.
9.4. Configure Tenant Allow/Block Lists to allow URL “protect.sorbsecurity.com” by clicking “submitting the URL” in the Microsoft Defender portal at https://security.microsoft.com, go to Email & Collaboration > Policies & Rules > Threat policies. Or, directly access https://security.microsoft.com/reportsubmission?viewid=url&new=%7B%22type%22%3A2%2C%22reason%22%3A2%7D


Note: You can download the powershell script to configure M365 by Connector. Highly suggest to follow the steps above, powershell does not consider the priority of the rules and connectors. Click DOWNLOAD